


Refresh Your Home with a DIY Paint Makeover | Transform Your Living Space
Refresh Your Home with a DIY Paint Makeover
Are you tired of the same old look of your home? Do you want to give it a fresh, new vibe without breaking the bank? A DIY paint makeover is the perfect solution! By putting your creativity to work and investing a little time and effort, you can transform your living space and make it feel brand new. In this article, we will guide you through the process of refreshing your home with a DIY paint makeover. From choosing the right paint color to adding creative touches, you’ll discover everything you need to know to revitalize your living space.
Benefits of a DIY Paint Makeover
A DIY paint makeover offers numerous benefits that make it an attractive option for homeowners. Firstly, it is a cost-effective way to update your home’s appearance. Rather than hiring professional painters, you can save money by doing the job yourself. Additionally, painting your own home gives you full control over the process and allows you to unleash your creativity. It’s an opportunity to personalize your space and create a unique atmosphere that reflects your style and personality.
Choosing the Right Paint Color
Selecting the right paint color is crucial to achieve the desired look and feel for your home. Start by considering the existing elements in the room, such as furniture, flooring, and decor. Take note of the color schemes and try to choose a paint color that complements or contrasts well with these elements. It’s also essential to consider the lighting in the room as it can significantly impact the appearance of the paint color. Collect paint samples and test them on the walls to see how they look under different lighting conditions.
Preparing Your Home for Painting
Before diving into the painting process, adequate preparation is key to achieving a professional finish. Begin by clearing the room of furniture and other items or cover them with protective sheets. Next, inspect the walls for any imperfections and repair them with putty or filler. Sand down rough areas and wipe the walls clean to ensure a smooth surface. Use painter’s tape to protect trim, baseboards, and other areas you don’t want to paint.
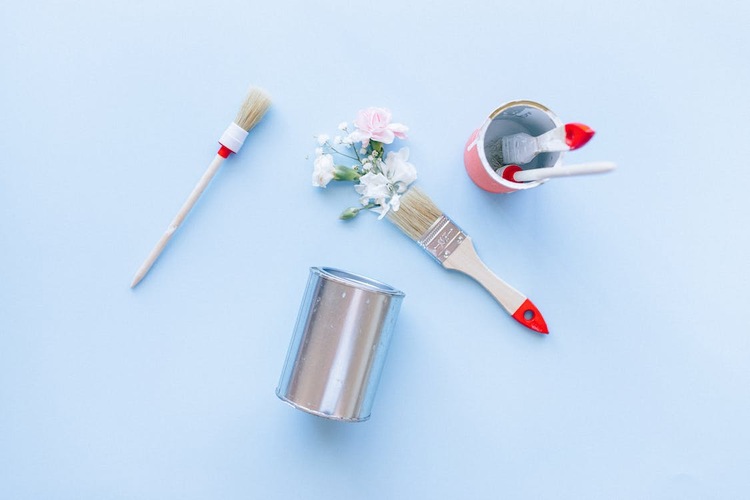
Essential Tools and Materials
To successfully complete your DIY paint makeover, you’ll need a set of essential tools and materials. These include paintbrushes, rollers, extension poles, paint trays, drop cloths, sandpaper, putty knives, painter’s tape, and cleaning supplies. Investing in high-quality tools will make the painting process easier and ensure better results. Consider the type of paint you’ll be using, whether it’s latex or oil-based, and choose the appropriate tools accordingly.
Step-by-Step Guide to DIY Painting
Now that you’ve prepared your home and gathered the necessary tools, it’s time to start painting. Follow these step-by-step instructions to achieve a successful DIY paint makeover:
Step 1: Prepare the walls
Clean the walls thoroughly to remove any dirt, grease, or dust. This ensures better paint adhesion and a smoother finish.
Step 2: Apply primer
If your walls have stains, dark colors, or are porous, applying a primer is essential. It helps the paint adhere better and provides a consistent base.
Step 3: Cut in the edges
Use a brush to carefully paint along the edges of the walls, where the roller cannot reach. This creates clean lines and makes the job easier when using the roller.
Step 4: Roll the walls
Load your roller with paint and apply it in a “W” or “N” pattern for even coverage. Start from the top and work your way down, overlapping the edges slightly.
Step 5: Repeat the process
Continue painting the walls in manageable sections until the entire room is covered. Allow the paint to dry between coats if necessary.
Step 6: Remove painter’s tape
Once the paint is dry, carefully remove the painter’s tape to reveal clean, crisp edges.
Tips for Achieving a Professional Finish
To elevate the quality of your DIY paint makeover, consider the following tips:
- Use high-quality paint to ensure a long-lasting finish.
- Take breaks and allow the paint to dry thoroughly between coats.
- Remove outlet covers and light switch plates before painting for a neater look.
- Paint in natural daylight or use good lighting to accurately assess the color and coverage.
- Use an angled brush for cutting in to achieve precise lines.
Adding Creative Touches with Paint
A DIY paint makeover opens up endless possibilities for adding creative touches to your home. Consider these ideas:
1. Accent walls
Choose a bold color and paint one wall to create a focal point in the room. This technique adds depth and visual interest.
2. Stencils and patterns
Experiment with stencils or create patterns using painter’s tape. This adds a unique touch to your walls, furniture, or even floors.
3. Two-tone walls
Paint the top half of the wall in one color and the bottom half in another. This technique adds visual appeal and can make a room appear taller or wider.
4. Painted furniture
Revitalize old or worn-out furniture by giving it a fresh coat of paint. This not only extends its life but also allows you to match it with your new color scheme.
Revitalizing Furniture with Paint
If you have furniture that doesn’t quite fit into your new color scheme, don’t rush to replace it. Instead, consider giving it a makeover with paint. Wooden furniture, such as chairs, tables, or cabinets, can be sanded down and painted in a color that complements your home. This allows you to breathe new life into old pieces and create a cohesive look throughout your space.
Cleaning Up and Maintaining the Fresh Look
Once you’ve completed your DIY paint makeover, it’s essential to clean up properly and maintain the fresh look. Remove any paint splatters or drips using a damp cloth before they dry. Clean your brushes and rollers thoroughly to reuse them in the future. Regularly dust and clean your newly painted walls to preserve their beauty. By adopting proper cleaning habits, you can enjoy the results of your DIY paint makeover for years to come.
Common Mistakes to Avoid
While DIY painting is a fun and rewarding project, it’s important to be aware of common mistakes to avoid:
1. Insufficient surface preparation
Skipping or inadequately preparing the walls can result in paint peeling or not adhering properly.
2. Poor color choices
Failing to test paint samples or not considering the existing elements in the room can lead to disappointing results.
3. Rushing the process
Painting requires patience and attention to detail. Rushing can result in uneven coverage, drips, or smudges.
4. Neglecting proper ventilation
Ensure good airflow in the room while painting by opening windows or using fans. This helps with drying and minimizes the fumes.
Time and Cost Considerations
The time and cost of a DIY paint makeover depend on the size of the room and the complexity of the project. Generally, a small to medium-sized room can be completed within a weekend. As for the cost, it varies depending on the quality and quantity of paint, tools, and any additional materials needed. However, compared to hiring professional painters, a DIY paint makeover offers significant cost savings.
DIY Paint Makeover Inspiration
Need some inspiration for your DIY paint makeover? Here are a few ideas to get you started:
- Coastal Retreat: Paint your walls in soft blues and whites to create a serene and relaxing beach-inspired atmosphere.
- Bohemian Chic: Experiment with vibrant colors, patterns, and textured finishes to achieve a boho-inspired look.
- Scandinavian Minimalism: Opt for neutral tones, such as whites, grays, and pastels, to create a clean and minimalist aesthetic.
- Farmhouse Charm: Embrace rustic charm by incorporating distressed finishes and earthy color palettes.
Remember, the possibilities are endless, and you can mix and match styles to create a look that suits your taste and lifestyle.
Frequently Asked Questions
Q: How long should I wait between paint coats?
It’s generally recommended to wait at least two to four hours between paint coats. Refer to the paint manufacturer’s instructions for specific drying times.
Q: Can I paint over wallpaper?
Painting over wallpaper is possible, but proper surface preparation is crucial. Ensure the wallpaper is firmly attached and smooth out any bubbles or loose edges before applying primer and paint.
Q: Do I need to sand the walls before painting?
Sanding the walls helps create a smooth surface and allows the paint to adhere better. It’s especially important if there are imperfections or a glossy finish.
Q: How do I clean my painted walls?
Use a soft cloth or sponge dampened with mild soap and water to gently clean painted walls. Avoid using abrasive cleaners that may damage the paint.
Q: Can I paint over oil-based paint with latex paint?
Yes, you can paint over oil-based paint with latex paint. However, proper surface preparation and the use of a suitable primer are essential for optimal adhesion.
Conclusion
A DIY paint makeover is an excellent way to refresh your home and unleash your creativity. By following the step-by-step guide provided in this article, you can achieve a professional finish and transform your living space. From choosing the right paint color to adding creative touches, the possibilities are endless. So, roll up your sleeves, grab a paintbrush, and give your home the makeover it deserves!