


Step-By-Step Guide To Stucco Wall Repair In Bradenton, FL
Stucco walls are a popular choice for homes in Bradenton, FL, thanks to their durability, aesthetic appeal, and ability to withstand the region’s weather.
However, even the best stucco can suffer damage over time due to weather conditions, age, or poor installation. If you’re dealing with cracks, holes, or chipped stucco on your home, you might be wondering whether it’s time to call a professional or tackle the repair yourself.
While larger repairs may require an expert, smaller cracks or damage can be handled with a step-by-step approach.
Here, we will walk you through the process of stucco repair in Bradenton, FL, so you can restore your home’s exterior and maintain its curb appeal.
Why Stucco Repair Is Important In Bradenton, FL
Stucco is a sturdy material, but it’s not immune to damage. In Bradenton, the humid climate and seasonal storms can cause stucco walls to crack, chip, or even degrade. These issues not only affect the appearance of your home but can also lead to water damage or mold growth if left unattended. Stucco repair is essential to maintaining the integrity of your home and ensuring that it remains protected against the elements.
While professional stucco repair in Bradenton, FL, is always an option, some minor repairs can be done yourself with the right tools and techniques. Follow these steps to address small stucco damage and improve your home’s exterior.
Step 1: Assess The Damage
Before starting any repair, it’s important to assess the extent of the damage. Small cracks and holes can often be fixed easily, but larger or deeper damage may require a more thorough repair or even professional assistance.
- Hairline Cracks: These are typically no more than 1/8 inch wide and can be repaired without the need for a complete resurface.
- Larger Cracks: Cracks larger than 1/8 inch may require filling and patching. If the crack runs deep into the wall or covers a large area, you might need to consider professional repair.
- Chips or Holes: Small holes or chips can be filled with a stucco patch. If the hole is too large, a professional may need to reapply stucco to the entire area.
Step 2: Gather Your Tools and Materials
To repair stucco in Bradenton, FL, you’ll need a few basic tools and materials. Depending on the size and type of damage, the following items will help ensure a smooth and effective repair:
- Stucco Patch: For filling cracks or holes.
- Trowel: To apply the patch and smooth the surface.
- Wire Brush: To clean the damaged area and remove loose debris.
- Caulk or Sealant: To fill any small cracks or gaps.
- Primer and Paint: For finishing the repair and ensuring that the new stucco blends seamlessly with the surrounding area.
- Protective Gear: Wear gloves, goggles, and a mask to protect yourself from dust and debris.
Step 3: Clean The Damaged Area
Before applying any patch or sealant, thoroughly clean the damaged area. Use a wire brush to scrub away any loose debris, dirt, or chipped stucco. If the crack or hole is large, use a small hammer to knock out any loose pieces of stucco.
Cleaning the area is important for ensuring that the new material adheres properly to the wall and provides a durable, long-lasting repair. Make sure the surface is dry before proceeding to the next step.
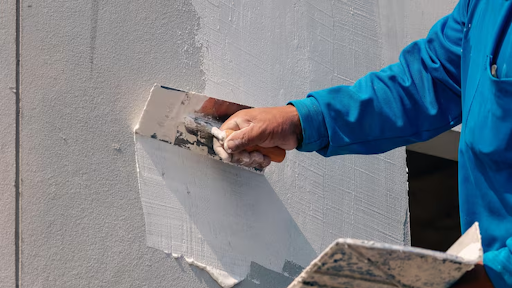
Step 4: Apply The Stucco Patch
Once the damaged area is clean, it’s time to apply the stucco patch. Follow these steps:
- Prepare the Patch: If you’re using a pre-mixed stucco patch, simply stir it to ensure it’s smooth. For powder-based patches, mix the product with water according to the instructions.
- Apply the Patch: Using a trowel, apply the stucco patch to the damaged area, pressing it into any cracks or holes. Smooth the surface to match the surrounding wall as closely as possible.
- Layer the Patch: For larger cracks or holes, you may need to apply the patch in layers. Allow each layer to dry before applying the next, and ensure that the final layer is smooth and level.
Step 5: Smooth and Texture the Repair
Once the patch has dried, you can smooth out the surface using a trowel. If the texture of your original stucco is rough, use a sponge or brush to reapply a similar texture to the patch.
For a more customized texture, you can experiment with different tools, such as a broom or a stipple brush, to match the appearance of your home’s existing stucco. If you’re not sure how to match the texture exactly, consider consulting a professional stucco repair service in Bradenton, FL.
Step 6: Prime and Paint the Repaired Area
After your patch has dried completely, apply a coat of primer to the repaired section. This step helps the paint adhere to the surface and provides a smooth base for finishing. Once the primer has dried, apply exterior-grade paint that matches the color of your home’s stucco.
Be sure to choose paint that is suitable for stucco and exterior conditions in Bradenton, FL, as the humid environment can affect how well the paint holds up. Choose a high-quality, weather-resistant paint to ensure a long-lasting finish.
Step 7: Inspect the Repair
Once the paint is dry, take a step back and inspect the repair. Ensure that the patched area is seamless and blends well with the rest of your stucco wall. If you notice any imperfections or areas that need touch-ups, reapply the patch, texture, or paint as necessary.
Conclusion
Stucco repair in Bradenton, FL, doesn’t have to be a daunting task. By following this step-by-step guide, homeowners can address minor damage and restore their stucco walls to their original condition.
If the damage is extensive or you’re unsure about tackling the repair yourself, don’t hesitate to contact a professional stucco installation contractor in Bradenton, FL, to ensure a quality finish.
Keep your home looking great and protected by taking care of stucco damage as soon as it appears!